
Recording sports game footage used to mean fumbling with DVRs and hoping your console’s built-in capture didn’t choke during that game-winning buzzer-beater. Not anymore. Whether you’re grinding Ultimate Team in FC 25, perfecting your shot meter timing in NBA 2K25, or dominating Madden’s franchise mode, capturing high-quality gameplay has never been more accessible, or more important.
The rise of sports gaming content on YouTube, Twitch, and TikTok has turned clutch plays, pack openings, and franchise builds into legitimate content categories. But there’s a gap between hitting “record” and producing watchable footage. Frame drops during crucial moments, desynchronized audio, and bloated file sizes can kill even the best content before it reaches your audience.
This guide walks through everything needed to record sports games properly in 2026: software choices across platforms, hardware that won’t bottleneck performance, optimization settings that balance quality with system resources, and the editing workflow that turns raw footage into shareable highlights. No fluff, no vague advice, just the specific tools and settings that work.
Key Takeaways
- GPU encoding (NVENC for NVIDIA, VCE for AMD) is the secret to recording sports games without sacrificing FPS, reducing performance impact to just 1-3% compared to 15-20% with CPU encoding.
- How to video sports games successfully requires matching recording resolution to your audience—1080p60 remains the sweet spot for most platforms and viewers, delivering quality content without excessive storage demands.
- Free software like OBS Studio provides professional-grade features for recording, with replay buffer functionality perfect for capturing unexpected highlight moments in sports games without pre-recording entire sessions.
- Dedicated storage on a secondary SSD eliminates stuttering during recordings by preventing I/O conflicts when your system reads game assets and simultaneously writes video data.
- Clean audio mixing with separate tracks for game sound, microphone commentary, and optional chat gives you editing flexibility to adjust levels independently and remove unwanted sections in post-production.
- Consistent upload schedules aligned with real-world sports seasons maximize algorithmic performance—post sports gaming content during relevant seasons (NBA 2K: October-June, Madden: September-February) when audience interest peaks.
Why Recording Your Sports Gaming Sessions Matters
Sports games thrive on moments. That last-second three-pointer, the perfectly timed defensive play, the pack opening that finally delivers an icon card, these aren’t experiences you want locked in memory alone. Recording transforms fleeting victories into shareable content, proof of skill, and material for improvement.
Content creation aside, recorded gameplay serves as a coaching tool. Reviewing defensive rotations in NBA 2K or audible calls in Madden reveals patterns and mistakes that aren’t obvious during live play. Competitive players study their footage the same way athletes review game film, it’s how you spot tendencies, optimize strategies, and level up.
Then there’s the community angle. Sports gaming communities on Reddit, Discord, and Twitter constantly share highlight reels, tutorial breakdowns, and strategy guides. Without recording capability, you’re a spectator in conversations where everyone else brings receipts. Whether building a following or just showing friends that absurd goalkeeper blunder in FC 25, recording is the entry fee.
Finally, monetization opportunities exist for creators who consistently produce quality sports gaming content. YouTube partner programs, Twitch subscriptions, and sponsorships from gaming peripheral brands all require a portfolio of recorded content. The bar for entry isn’t astronomical, but it does require recording setups that deliver consistent quality.
Choosing the Right Recording Software for Sports Games
Best Free Recording Software Options
OBS Studio remains the gold standard for free recording software in 2026. Its open-source nature means constant updates, plugin support, and zero paywalls. OBS handles sports games exceptionally well, configure scene collections for different titles, set up replay buffer for instant clip saving, and customize hotkeys for recording controls without tabbing out mid-match.
The learning curve exists but isn’t steep. Most sports gamers need one scene (game capture), basic audio mixing (game sound + mic), and proper encoding settings. OBS’s Studio Mode lets you preview changes before going live, crucial when testing new overlay graphics or camera angles.
NVIDIA ShadowPlay (now GeForce Experience) offers the simplest free option for NVIDIA GPU owners. The Instant Replay feature continuously buffers the last 1-20 minutes of gameplay, saving clips retroactively when you hit Alt+F10. Perfect for sports games where highlight moments happen unexpectedly, you don’t need to predict when you’ll hit that perfect green release.
ShadowPlay’s NVENC encoder offloads work from your CPU to the GPU’s dedicated encoding chip, minimizing performance impact. The trade-off: less customization than OBS and NVIDIA-exclusive availability.
AMD ReLive serves the same function for Radeon GPU users. Quality matches ShadowPlay, with similar instant replay functionality and GPU-accelerated encoding through AMD’s VCE technology. The interface integrates directly into Radeon Software, making it accessible without separate downloads.
Premium Recording Software Worth the Investment
Streamlabs Desktop is essentially OBS with a user-friendly wrapper and premium features locked behind Streamlabs Ultra ($19/month or $149/year in 2026). The free tier works well, but paid features like multistreaming, custom branding removal, and priority support appeal to serious content creators.
For sports gamers specifically, Streamlabs’ built-in widgets for follower counts, recent subscribers, and chat overlays integrate cleanly. The mobile app lets you monitor recordings remotely, useful when rendering long franchise mode sessions overnight.
XSplit Gamecaster ($7.50/month or $60/year) prioritizes ease of use over raw control. Its one-click recording presets optimize settings automatically based on detected games. The interface feels less intimidating than OBS, though power users may find the streamlined controls limiting.
XSplit’s replay editing feature lets you trim clips immediately after saving, cutting dead air before files even hit your storage drive. For rapid-fire content creators posting to TikTok or Instagram Reels, this workflow compression saves hours.
Elgato 4K Capture Utility (free with Elgato capture cards) deserves mention as premium-adjacent. While the software itself is free, it requires Elgato hardware. The utility’s Flashback Recording mirrors ShadowPlay’s instant replay but works universally across PC and console sources routed through the capture card. The hardware setup tutorials available online cover integration with streaming software for advanced workflows.
Console-Specific Recording Solutions
PlayStation 5’s built-in Create button functionality has improved significantly since launch. As of firmware 8.5 (February 2026), the PS5 captures up to 4K60 gameplay with HDR support. The recent update added customizable clip lengths from 15 seconds to 3 hours, finally matching Xbox’s flexibility.
Saved clips live in the Media Gallery and transfer via USB or direct upload to YouTube. Quality is solid for casual sharing, though bitrate caps (around 40 Mbps) create noticeable compression artifacts in fast-motion sports games like NHL or UFC. For serious archiving, capture cards remain superior.
Xbox Series X/S captures at 4K60 (Series X) or 1440p60 (Series S) through the Share button. Microsoft’s Game DVR can record up to 1 hour continuously or use background recording to save the last 30 seconds to 10 minutes retroactively. The Xbox app for Windows streamlines editing and sharing, with integration for OneDrive cloud storage.
One advantage: Xbox captures support HDR Auto Tone Mapping, automatically converting HDR footage to SDR for platforms that don’t support high dynamic range. Saves an editing step when uploading to Twitter or Discord.
Nintendo Switch lags behind, capping recordings at 1080p30 for supported titles, with a strict 30-second maximum length. Most major sports titles on Switch (NBA 2K, FIFA legacy editions) support capture, but the limited duration makes it useful only for brief highlights. For longer sessions, a capture card is non-negotiable.
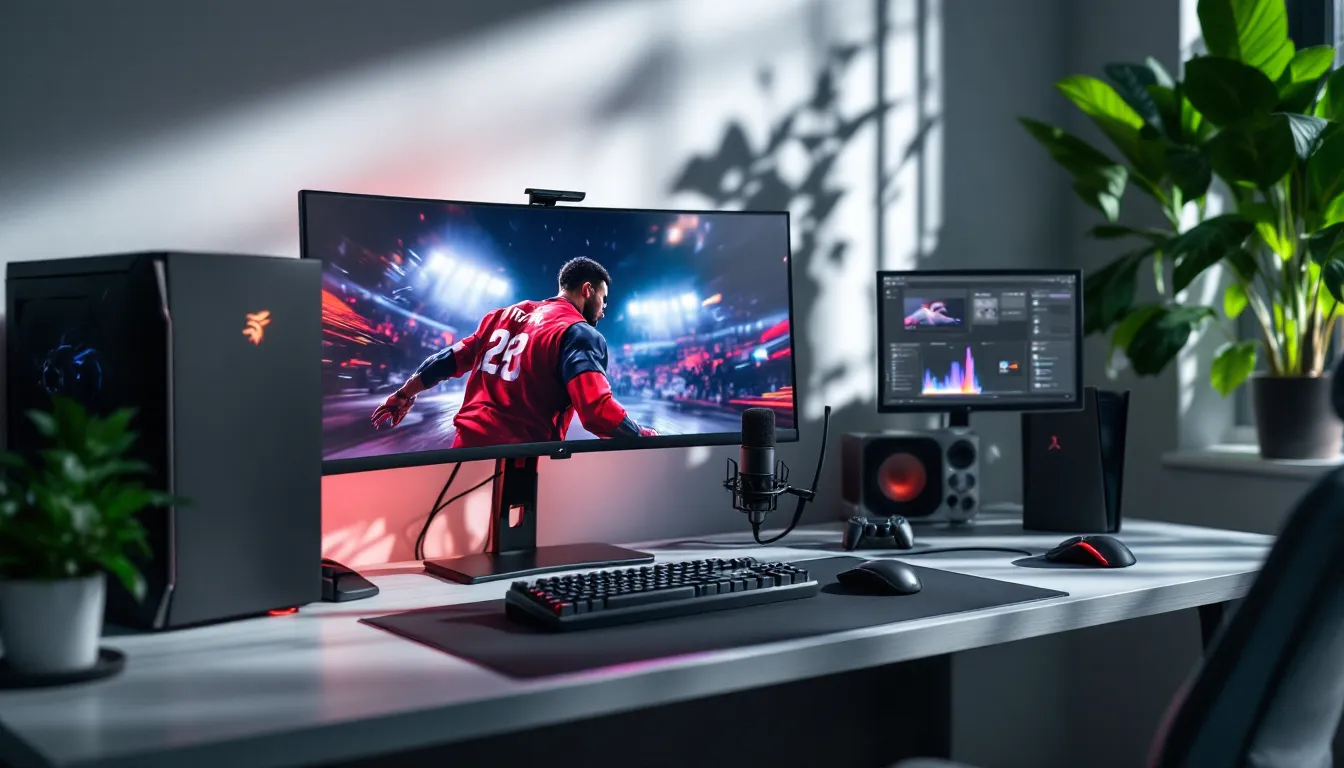
Essential Hardware Setup for High-Quality Sports Game Recording
PC Hardware Requirements and Optimization
Recording adds computational overhead, expect to sacrifice 10-25% of system resources depending on encoding method. For sports games targeting 60+ FPS (essential for competitive titles), hardware choices matter.
Minimum specs for 1080p60 recording:
- CPU: Intel i5-10400 or AMD Ryzen 5 3600 (6-core/12-thread minimum)
- GPU: NVIDIA GTX 1660 or AMD RX 5600 XT
- RAM: 16GB DDR4 (recording software and games compete for memory)
- Storage: 500GB SSD for recording scratch disk (mechanical drives create bottlenecks)
Recommended specs for 1440p60+ or 4K30:
- CPU: Intel i7-12700K or AMD Ryzen 7 5800X3D (8+ cores for CPU encoding headroom)
- GPU: NVIDIA RTX 3070 or AMD RX 6800 (NVENC/VCE encoding crucial)
- RAM: 32GB DDR4/DDR5
- Storage: 1TB NVMe SSD (sports game footage accumulates fast, an hour at 1080p60 runs 15-30GB)
GPU encoding (NVENC for NVIDIA, VCE for AMD) is the secret weapon. These dedicated chips handle compression independently of your main GPU cores, meaning recording impact on game FPS drops to 1-3% instead of 15-20% with CPU encoding. NVIDIA’s latest NVENC (on RTX 40-series) approaches x264 Medium quality while maintaining this efficiency.
Storage strategy matters more than most realize. Recording to the same drive where games are installed creates I/O conflicts, the system reads game assets while simultaneously writing video data. Dedicate a secondary SSD exclusively for recordings. For budget builds, a 500GB SATA SSD as a scratch disk costs under $40 and eliminates stuttering.
Capture Cards for Console Gaming
Capture cards bridge consoles to PC recording software, bypassing built-in console recording limitations. Two categories exist: internal PCIe cards and external USB devices.
Internal PCIe capture cards:
-
Elgato 4K60 Pro MK.2 ($269 in 2026): PCIe x4 card supporting 4K60 HDR passthrough and capture. Zero-latency passthrough means no input delay, you game on your TV/monitor as normal while the card sends a duplicate feed to your PC for recording. Requires an available PCIe slot and compatible motherboard.
-
AVerMedia Live Gamer 4K ($249): Similar specs to Elgato with slightly better included software. Some users report more stable drivers for AMD-based recording PCs.
External USB capture cards:
-
Elgato HD60 X ($199): USB 3.0 external card capturing up to 1080p120 or 4K30 with HDR. Portability is the advantage, move between setups or record at friends’ houses. The trade-off: USB bandwidth limitations prevent true 4K60 capture.
-
AVerMedia Live Gamer Portable 2 Plus ($149): Budget-friendly option with SD card recording, capture directly to microSD without a PC. Quality caps at 1080p60, and built-in encoding produces larger file sizes, but it’s genuinely portable.
Passthrough vs. capture resolution: Modern cards separate these specs. A card might pass through 4K120 to your display (maintaining game performance) while capturing 1080p60 (reducing file size and processing load). Check specs carefully, “supports 4K” often means passthrough only.
Connection setup: Console HDMI out → Capture card HDMI in → Capture card HDMI out → TV/monitor. The PC connects to the capture card via USB or PCIe, running OBS or equivalent to record the video feed. Most cards introduce 50-100ms of capture latency, but passthrough remains zero-delay, you play on the passthrough feed, not the captured one.
Optimizing Your Recording Settings for Sports Games
Resolution and Frame Rate Considerations
Match recording resolution to your display and upload platform. Recording at 4K when your audience watches on mobile phones wastes storage and processing time. Here’s the practical breakdown for 2026:
1080p (1920×1080): Still the sweet spot for most sports gaming content. YouTube analytics show 70%+ of gaming viewers watch at 1080p or lower. File sizes remain manageable (15-25GB per hour at quality settings), editing doesn’t require workstation-class hardware, and upload times stay reasonable on typical home internet.
1440p (2560×1440): Growing in popularity as mid-range monitors adopt the resolution. Offers noticeable quality improvement over 1080p without the storage bloat of 4K. Good choice if your PC can maintain 1440p60+ in-game while recording. File sizes run 25-40GB per hour.
4K (3840×2160): Necessary only if you’re archiving footage for future-proofing, creating montages where you’ll crop/zoom without quality loss, or targeting the small percentage of viewers with 4K displays. Expect 50-80GB per hour and significantly longer export times. Most sports gaming channels haven’t adopted 4K as standard, the ROI isn’t there yet.
Frame rate is non-negotiable: 60 FPS minimum for sports games. The genre depends on smooth motion, tracking fast breaks in NBA 2K or following through balls in FC 25 looks stuttery and amateurish at 30 FPS. Don’t let recording settings drop you below 60.
Some creators record at 120 FPS for slow-motion editing capability, but this requires high-end hardware and doubles file sizes. Reserve for specific highlight reels, not standard content.
Bitrate and Encoding Settings Explained
Bitrate determines how much data per second goes into your video file. Higher bitrate = better quality but larger files. Too low, and compression artifacts ruin your footage during camera pans or fast action.
Recommended bitrates for local recording (not streaming):
- 1080p60: 12,000-20,000 kbps (12-20 Mbps)
- 1440p60: 20,000-35,000 kbps (20-35 Mbps)
- 4K60: 50,000-80,000 kbps (50-80 Mbps)
These rates assume H.264 (x264/NVENC) encoding. The newer H.265 (HEVC) codec achieves similar quality at 30-40% lower bitrates but requires more powerful hardware for editing and isn’t universally supported on older devices.
Encoding presets balance quality against CPU/GPU load:
For NVIDIA NVENC users:
- Quality preset: Use “Max Quality” for local recordings (minimal performance impact with modern GPUs)
- Encoder: NVENC H.264
- Rate Control: CBR (Constant Bitrate) for consistent file sizes, VBR (Variable Bitrate) for slightly better quality at similar average bitrate
For CPU encoding (x264):
- Preset: “Medium” offers excellent quality/performance balance. “Fast” reduces CPU load if you’re struggling with FPS drops. “Slower” or “Slow” provide marginal quality gains but hammer weaker CPUs.
- Only use CPU encoding if you lack NVENC/VCE, or you’re archiving footage where maximum quality justifies the performance cost.
For AMD VCE/AMF users:
- Settings mirror NVENC philosophy. Use “Quality” preset and let the GPU handle the work.
Many competitive sports gamers reference pro player settings when optimizing their recording configurations to minimize system impact while maintaining stream-quality footage.
Audio Configuration for Commentary and Game Sound
Bad audio kills otherwise great content faster than mediocre video quality. Sports game recordings typically juggle three audio sources: game sound, microphone commentary, and sometimes Discord/party chat.
In OBS, set up separate audio tracks:
- Desktop Audio (Track 1): Captures game sound and system audio
- Microphone (Track 2): Your commentary
- Auxiliary Audio (Track 3, optional): Party chat via virtual audio cable routing
Recording to separate tracks gives editing flexibility, adjust commentary volume without touching game sound, remove sections where you weren’t talking, or mute a friend’s background noise.
Audio levels:
- Game sound: Peak around -18dB to -12dB (leave headroom for commentary)
- Microphone: Peak around -12dB to -6dB (should sit slightly above game audio)
- Apply a noise gate filter to your mic (threshold around -40dB) to cut background hum
- Add a compressor filter (ratio 3:1, threshold -18dB) to even out quiet and loud speech
Microphone choice matters. Built-in laptop mics produce tinny, echo-filled audio. Budget USB mics like the Blue Snowball ($50) or Fifine K669B ($30) are dramatic upgrades. The HyperX QuadCast S ($160) has become the sports gaming standard, built-in shock mount, gain control, and tap-to-mute reduce post-production work.
For monitoring, enable audio playback monitoring in OBS only during setup, leaving it on creates echo during recording. Test levels by recording 30 seconds, playing it back, and adjusting. Game audio should be clear but not overwhelming: your voice should be easily intelligible without shouting.
Recording Gameplay Across Different Sports Game Titles
Recording FIFA, FC, and Soccer Games
EA Sports FC 25 (formerly FIFA) runs on the Frostbite engine, which generally cooperates well with recording software but has quirks. As of Title Update 7 (March 2026), some PC players report stuttering when recording Ultimate Team menus specifically, not gameplay. Workaround: use Display Capture instead of Game Capture for menu navigation, then switch to Game Capture for matches.
FC 25’s new HyperMotionV technology creates extremely fast player animations and ball physics. This stresses encoders during chaotic box scrambles or fast counter-attacks. Bump bitrate 15-20% above standard recommendations for soccer titles to handle these motion-heavy sequences without blocking artifacts.
Anti-cheat compatibility: FC 25 uses EA AntiCheat, which conflicts with some overlay features in OBS and XSplit. Disable in-game overlays and browser sources if you experience crashes at launch. Game capture source works fine: just avoid layering additional overlays.
Career Mode and Ultimate Team: Ultimate Team pack openings are content gold but present a recording challenge, you want to capture initial packs live, but sessions can run hours. Use OBS replay buffer set to 5 minutes so you can retroactively save pack animations without recording entire sessions.
Career Mode recordings benefit from scene switching, create scenes for match gameplay, transfer negotiations (where you’ll want to zoom UI elements in post), and training sessions. Switching mid-recording creates edit markers in some software, streamlining post-production.
Capturing NBA, Madden, and Other Major Sports Titles
NBA 2K25 is one of the more resource-intensive sports games in 2026. The combination of detailed player models, crowd simulations, and court reflections pushes GPUs hard even before recording. Expect a 5-8% FPS drop even with NVENC encoding on recommended hardware.
The 2KTV integration and unskippable cutscenes in MyCareer create recording bloat. Use OBS’s recording pause hotkey (not stop, pause) during these segments to keep files manageable. The recent game guide resources covering 2K25 MyCareer show editing strategies focused on cutting these sections entirely.
MyTeam recordings face the same considerations as FC Ultimate Team, lots of menu time punctuated by actual gameplay. Configure separate scenes or use replay buffer to capture pack openings and auction house snipes without recording inventory management.
Madden NFL 25 on PC (via EA app) occasionally conflicts with background recording software if Origin overlay is enabled. Disable it in EA app settings before launching. Console recordings via capture card work flawlessly.
Madden’s presentation cameras and instant replays can confuse recording software into thinking resolution has changed, causing brief black screens. Workaround: in Madden’s settings, disable dynamic camera cuts, or configure OBS to scale/crop rather than match resolution changes.
NHL 25, UFC 5, and other EA Sports titles share similar Frostbite engine behaviors. UFC 5’s fighter entrances and post-fight replays are highlight-reel material but create encoding spikes, lots of particle effects, dramatic lighting changes, and camera cuts. Monitor OBS’s rendering lag indicator (bottom right): if it spikes above 5% during these sequences, your bitrate may be too high for your system.
Cross-platform considerations: If you record across PC and console, maintain parallel OBS profiles for each. Console footage through capture cards benefits from slight sharpening filters (2-3% in OBS) to counteract compression from the capture process. PC native recordings don’t need this.
Performance Tips to Avoid FPS Drops While Recording
Nothing ruins content like choppy gameplay footage. Frame drops during critical moments, game-winning shots, defensive stops, crucial audibles, kill the viewing experience. Here’s how to keep performance stable.
Prioritize GPU encoding. This can’t be overstated. NVENC and AMD VCE offload compression work from your CPU, which is already managing game logic, physics, and AI. The quality gap between modern GPU encoders and CPU-based x264 Medium has narrowed to near-imperceptible levels at recording bitrates. Only archive recordings for professional editing justify CPU encoding’s performance cost.
Close background applications. RGB lighting software (Corsair iCUE, Razer Synapse), game launchers not currently in use, browser windows with active streams, each siphons resources. Windows Task Manager’s Startup tab lets you disable programs that launch automatically. Keep only essentials: recording software, the game, and communication apps like Discord.
Adjust in-game settings strategically. Sports games let you drop specific settings with minimal visual impact:
- Lower crowd detail (often the first setting to cut FPS without affecting gameplay clarity)
- Reduce or disable motion blur (clearer footage anyway)
- Drop shadow quality one tier (medium → low typically saves 3-5 FPS)
- Maintain texture quality and resolution, these affect broadcast appearance more than performance
Windows Game Mode (Settings → Gaming → Game Mode) actually helps in 2026. Microsoft’s updates have fixed the early issues. Game Mode prioritizes CPU and GPU resources toward your game and designated recording software, preventing Windows Update and system maintenance from stealing cycles mid-recording.
Disable Windows Game DVR if you’re using third-party recording software. Game Bar (Win+G) and background recording run simultaneously with OBS/XSplit otherwise, doubling the load for no benefit. Turn it off in Settings → Gaming → Captures.
Monitor temperatures. Thermal throttling tanks performance unpredictably. Use MSI Afterburner or HWInfo64 to track CPU and GPU temps during recording sessions. If either consistently hits 85°C+, investigate cooling, clean dust filters, reapply thermal paste, or adjust fan curves. Recording sessions generate sustained load, more likely to trigger throttling than short gaming bursts.
Set process priorities. In Windows Task Manager, find your game’s .exe under Details tab, right-click, and set Priority to “High” (not Real-time, that can freeze the system). Do the same for your recording software. This tells Windows to favor these processes when allocating resources.
Pre-allocate recording storage space. Fragmented drives cause stuttering when the system hunts for available space mid-recording. SSDs handle this better than HDDs, but ensuring 100GB+ of free space prevents most issues. Periodically delete old raw footage after editing.
Test, test, test. Run a 10-minute recording while playing normally. Check for dropped frames in OBS’s stats (View → Stats). Dropped frames should stay below 0.5%. Rendering lag should stay under 2%. If numbers exceed these thresholds, dial back bitrate or in-game settings incrementally until stable.
Basic Video Editing for Sports Game Content
Trimming and Cutting Your Best Moments
Raw footage is boring. Even great players have possession sequences, timeouts, and menu navigation that viewers don’t need. Editing transforms 40 minutes of gameplay into 8 minutes of highlights.
Software tiers:
Free: DaVinci Resolve 19 remains the best free editor, period. Professional-grade color correction, Fairlight audio tools, and timeline editing that rivals paid competition. The learning curve is steeper than simpler options but worth it. Sports game content especially benefits from Resolve’s Cut page, designed for rapid rough cuts of long footage.
Budget: Filmora 13 ($49.99/year) balances ease of use with decent features. Pre-built templates for sports montages, automated beat syncing for music-timed highlights, and instant mode (AI auto-edit) can rough-cut hour-long sessions into 5-minute reels. Quality won’t impress professionals, but it ships content fast.
Professional: Adobe Premiere Pro ($22.99/month with Creative Cloud) is industry standard for reason. Deep integration with After Effects for motion graphics, unlimited tracks, advanced color grading, and plugin ecosystem. Overkill for most sports gaming YouTubers, but if content creation is serious business, Premiere scales with you.
The cutting process:
-
Scrub through raw footage at 2-4x speed, marking noteworthy moments with timeline markers (M key in most editors). Flag goals, big plays, funny moments, and tutorial-worthy examples.
-
Create a separate sequence/timeline for your edit. Drag marked clips into this new timeline. Start with more than you need, easier to remove later than hunt for missed moments.
-
Ruthlessly cut dead air. Time between plays, menu navigation, replays you’ve already seen, slice them out. Jump cuts are acceptable in gaming content. Viewers prefer snappy pacing over continuity.
-
Vary clip length. Not every highlight needs equal screen time. A buzzer-beater deserves buildup and replays: a routine dunk might get 3 seconds. Rhythm matters, mix longer sequences with rapid-fire cuts to maintain energy.
-
Use J and L cuts for audio. When transitioning between clips with commentary, let audio start slightly before video (J cut) or continue after (L cut). Creates smoother transitions than hard cuts.
Adding Overlays, Transitions, and Effects
Clean presentation separates amateur content from polished work. You don’t need Hollywood effects, subtle enhancements are enough.
Lower thirds: Text overlays displaying your name, social handles, or current game mode. Create a simple template (name/handle + small graphic) and place it in the first 10 seconds and occasionally throughout. Free templates exist on YouTube and MotionArray.
Scoreboard graphics: For montages combining multiple games, small overlays showing final scores or key stats (“30 PTS, 8 AST”) provide context. Keep these minimal, viewers can usually see in-game HUD.
Transitions: Resist the urge to use flashy wipes and spins between every clip. For sports content, clean cuts work 90% of the time. Reserve cross-dissolves for slower moments or scene changes, and whoosh/zoom transitions for highlight montages set to music.
Slow motion: Essential tool for emphasizing great plays. Most editors support time remapping or speed adjustments. Slow to 40-50% for a few seconds before the key moment, then return to normal speed or fast-forward through aftermath. Don’t overuse, one slow-mo per 2-3 minutes maintains impact.
Text callouts: Arrows, circles, or text highlighting specific plays (“ANKLE BREAKER” during a crossover, “GREEN LIGHT” on perfect releases) add personality. After Effects is ideal for animated callouts, but Premiere and DaVinci offer basic shapes and text animation.
Color grading: Optional for sports games since they’re already vibrant, but slight adjustments can help. Increase saturation 5-10% to make team jerseys pop, add slight contrast boost for definition. Don’t go overboard, sports games aren’t cinematic films.
Audio ducking: When you talk over gameplay, automatically lower game audio volume. Most editors have auto-duck functions (Adobe calls it “Auto Ducking” in Essential Sound panel). Set game audio to duck to 30-40% when commentary track is active. Keeps your voice intelligible without muting crowd reactions and whistles entirely.
Exporting and Uploading Your Sports Game Videos
Best Practices for YouTube, Twitch, and Social Media
Export settings directly affect upload times, video quality, and platform compatibility. Cookie-cutter exports waste time and quality.
YouTube export settings (2026 recommended):
- Container: MP4 (H.264 codec)
- Resolution: Match your recording (1080p, 1440p, 4K)
- Frame rate: 60 FPS (upload as constant frame rate, not variable)
- Bitrate: Use YouTube’s recommended upload bitrates:
- 1080p60: 12 Mbps
- 1440p60: 24 Mbps
- 4K60: 53 Mbps
- Audio: AAC codec, 320 kbps, stereo (48kHz sample rate)
YouTube’s processing applies additional compression, so uploading at higher bitrate than streaming recommendations preserves quality. Enable “Upload HDR” only if you recorded in HDR and your audience has compatible displays (still under 15% in 2026).
Video metadata: Title, description, and tags matter for discovery. Title should include game name, specific mode/team, and hook (“NBA 2K25 MyTeam: Pulling 3 ICONS in One Pack Opening.”). Description should link to social media, include timestamps for key moments, and list relevant specs (“Recorded on PC, RTX 4070, 1440p60”).
Thumbnails drive clicks more than titles. Create custom thumbnails with high-contrast text, expressive faces (yours or player close-ups), and clear visual focus. Tools like Canva offer gaming templates. Never use auto-generated frames, they’re bland.
Twitch considerations (VODs and highlights):
Twitch automatically archives streams as VODs, but creating highlights from these VODs provides better discoverability. Use Twitch’s built-in editor to clip segments, or download VODs and re-edit locally for higher quality.
If uploading edited content to Twitch (not live streaming), match export settings to YouTube but understand Twitch’s player caps playback at source quality based on viewer bitrate. VODs compress more aggressively than YouTube, so slightly higher export bitrate (15% over YouTube recommendations) helps.
TikTok, Instagram Reels, YouTube Shorts:
Vertical format (9:16 aspect ratio, 1080×1920) dominates short-form. This requires cropping or reformatting sports game footage, which is natively 16:9. Strategies:
- Crop to player focus: Center the frame on ball handler, removing sideline and crowd. Works for dribble moves, shooting, 1v1 defense.
- Zoom and pan: Manually keyframe zoom during editing to follow action, creating dynamic framing.
- Split screen: Show game footage in top 70% of frame, webcam reaction in bottom 30%.
Shorts and Reels favor snappy editing, 3-8 second clips, frequent cuts, upbeat music, text overlays explaining what’s happening. Hook viewers in the first second (“WATCH THIS PACK OPENING”) or they scroll.
Platform-specific exports:
- TikTok/Reels: MP4, 1080×1920, 30-60 FPS, 10-15 Mbps bitrate, under 90 seconds for algorithm favor
- Twitter: MP4, max 512MB file size, under 2:20 minutes for in-feed playback (longer videos require separate page view)
- Discord: File size caps at 25MB (free) or 500MB (Nitro). Use H.265 encoding to shrink files while maintaining quality, or upload to YouTube/Streamable and share link.
Upload timing strategy: YouTube’s algorithm favors consistent upload schedules. If publishing sports game content, align with real-world sports seasons when possible, NBA 2K content performs best October through June (NBA season), Madden peaks September through February (NFL season). Post when your audience is active, typically 2-4 PM or 6-9 PM in your primary timezone.
Archival copies: Always keep a high-bitrate master copy of edited videos before exporting for web. Storage is cheap: re-editing from a YouTube download that’s been double-compressed is painful. External HDDs ($50 for 2TB) provide cheap archival.
Troubleshooting Common Recording Issues
Black screen in OBS Game Capture: Most frequent issue, multiple causes:
- Run OBS as administrator (right-click .exe → Run as administrator)
- In Game Capture source properties, try toggling “Capture method” between Auto, Windows 10, and BitBlt
- Disable game mode in Windows (counterintuitive but fixes some DirectX conflicts)
- Update GPU drivers, outdated drivers cause capture hooks to fail
- For EA games specifically, disable Origin/EA app in-game overlay
Audio desync: Video and audio drift apart over time, usually caused by:
- Recording in variable frame rate (VFR) instead of constant (CFR). Fix in OBS: Settings → Output → Recording → set to CFR.
- Multiple audio sample rates conflicting. Set Windows default audio device to 48kHz (Sound settings → Advanced), match in OBS.
- Capture card HDMI handshake issues. Power cycle: turn off console, unplug capture card, plug back in, then power on console.
Choppy/stuttering playback but game felt smooth: The recording is dropping frames, not the game. Check OBS stats for “Frames missed due to encoding lag.” Solutions:
- Lower bitrate by 20%
- Switch from CPU to GPU encoding
- Change encoder preset to faster option (CPU) or lower quality preset (GPU)
- Close background apps
Massive file sizes: Hour-long recordings shouldn’t exceed 80GB even at 4K. If they do:
- Bitrate is set too high: refer to recommended bitrates earlier
- Recording in lossless or uncompressed format. Switch to H.264 with reasonable bitrate.
- Using incorrect container (AVI creates huge files). Use MP4 or MKV.
Recording stops randomly: Several culprits:
- Out of storage space. Always maintain 50GB+ free.
- Recording to slow/fragmented HDD. Move to SSD.
- Windows power settings putting drives to sleep. Disable in Power Options → Advanced.
- OBS auto-stop set by accident. Check Settings → Output → Recording → ensure no time/file size limits are enabled.
Mic sounds muffled/echoey: Environmental and setup issues:
- Position mic 6-8 inches from mouth, slightly off-axis (not directly in front to avoid plosives)
- Enable noise suppression and noise gate filters in OBS
- Record in smaller room with soft furnishings (curtains, carpet) to reduce echo
- If using headset mic, ensure it’s close to mouth and not picking up speaker output
Capture card shows “No Signal”:
- Verify HDMI cable from console to capture card is secure and rated for resolution/refresh rate (HDMI 2.0 minimum for 4K60)
- Check if console has HDCP enabled. PS5: Settings → System → HDMI → disable HDCP. Xbox auto-disables when game is running.
- Try different HDMI port on console
- Update capture card firmware via manufacturer website
Performance tanking during recording: You’ve checked all optimization tips but still struggling:
- Your hardware may be under minimum spec for desired settings. Scale back resolution or frame rate.
- Test recording different games. Some titles are poorly optimized and choke systems regardless.
- Monitor Task Manager during recording to identify if CPU, GPU, RAM, or disk is bottlenecking (whichever hits 100% first).
- Thermal throttling is silent killer. Check temps under load.
YouTube upload stuck processing or quality is blurry: YouTube processing takes time. HD/4K processing can take 2-12 hours depending on file size and server load. If quality is blurry immediately after upload:
- Low-quality version appears first: give it time to process higher resolutions
- If it stays blurry for 24+ hours, your export bitrate was likely too low. Re-export with higher bitrate.
- Check Processing Status in YouTube Studio’s Content tab for specific errors.
Conclusion
Recording sports game footage has evolved from a nice-to-have to essential infrastructure for anyone serious about gaming content. The technical barriers that existed even two years ago, expensive hardware, complicated software, and performance trade-offs, have largely dissolved. GPU encoding delivers quality that rivals CPU compression without the FPS hit. Capture cards support 4K60 passthrough at prices under $200. Free software like OBS matches or exceeds paid alternatives for most use cases.
What hasn’t changed: quality content still requires intention. The right settings mean nothing if you’re recording an hour of meaningless possessions instead of curated highlights. Understanding your hardware’s limits prevents the frustration of dropped frames during clutch moments. Knowing platform-specific export settings ensures your content looks as good on viewers’ screens as it did during recording.
The sports gaming community rewards creators who bring something beyond raw skill, analysis, personality, production value. Recording is step one. What you do with that footage, the editing choices, the pacing, the narrative you build around highlights, determines whether anyone watches past the first 10 seconds.
Start simple. Record a few sessions with basic settings. Review the footage critically. Identify what works and what frustrates you about the process. Iterate from there. The gap between “I hit record” and “I created something worth watching” closes faster than you’d expect when you’re actively experimenting rather than waiting for perfect conditions.
Your best content is still unrecorded. The tools to capture it are ready whenever you are.